路由交换_作业2_1.3.6.配置SSH
当前进度1.0
这个作业超级快ovo
更新地址:https://type.dayiyi.top/index.php/archives/135/
更新中修改的内容:
在试错过程中发现并修改的内容:
目前还没有准备文件:
- 1.3.6-packet-tracer---configure-ssh_zh-CN.docx
- 1.3.6-packet-tracer---configure-ssh_zh-CN.pka
备用:
打开PKA文件:

0x00 地址分配表
0x01
  - 目录以16进制的形式标注。
  - 话说怎么写目录比较好呀,求个建议。
这次的作业似乎比上次快一点?也许吧
地址分配表
| 设备 | 接口 | IP 地址 | 子网掩码 |
|---|---|---|---|
| S1 | VLAN 1 | 10.10.10.2 | 255.255.255.0 |
| PC1 | NIC | 10.10.10.10 | 255.255.255.0 |
0x01 第 1 部分:安全密碼
第 1 部分:安全密碼
a. 使用 PC1 上的命令提示字元, Telnet 到 S1. 使用者 EXEC 和特權 EXEC 密碼是 cisco.
0x01a 步骤a
- 双击PC1
- 点击Desktop
- 点击Telnet 应用(在列表的最下面)
输入IP地址:
10.10.10.2- 点击连接
- 密码为
cisco
图解:

0x01b 步骤b
b. 儲存目前的設定,以便透過關開 S1 的電源來回復你 可能犯的任何錯誤。
复制配置文件到启动文件,这样在修改当前配置可以进行恢复。
将RAM(内存)的配置复制到NVRAM(NVRAM( Non-Volatile Random Access Memory) 是非易失性的内存,断电后仍能保持数据的一种内存),就是一个内存条,但是断电了还能保存内存中的数据。
输入:
enable
copy running-config startup-config
输出内容(终端内容):
S1>enable
Password: (密码为cisco)
S1#copy run[按TAB]
S1#copy running-config sta[按TAB]
S1#copy running-config startup-config
Destination filename [startup-config]? 回车(直接使用startup-config这个名字)
Building configuration...
[OK]
S1#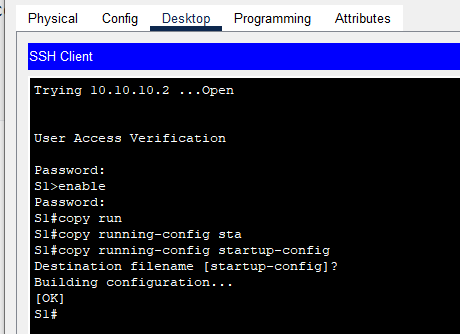
0x01c 步骤c
c. 顯示目前的設定,並注意密碼是純 文字。輸入加密純文字密碼的命令:
S1(config)# service password-encryption
输入命令:
config
service password-encryption

S1#config ->进入config模式
S1(config)# service password-encryption
0x01d 步骤d
d. 確認密碼已加密。
在enable模式下输入命令:
show running-config输出内容(删除部分无关内容):
S1#show running-config
Building configuration...
Current configuration : 1174 bytes
!
version 15.0
no service timestamps log datetime msec
no service timestamps debug datetime msec
service password-encryption
!
hostname S1
!
enable password 7 0822455D0A16

!
spanning-tree mode pvst
spanning-tree extend system-id
interface FastEthernet0/1
interface GigabitEthernet0/2
!
interface Vlan1
 ip address 10.10.10.2 255.255.255.0

!
line con 0
!
line vty 0 4
 password 7 0822455D0A16
 login
line vty 5 15
 password 7 0822455D0A16
 login

!
end

S1#
可见:
password 7 0822455D0A16密码不是明文字符编码,密码已经加密。
0x01d 步骤d 平行世界支线
无关内容,为了好奇而存在。
如果不执行步骤c的命令会发生什么:
S1#show running-config
Building configuration...
hostname S1
enable password cisco
...
line con 0
line vty 0 4
 password cisco
 login
line vty 5 15
 password cisco
 login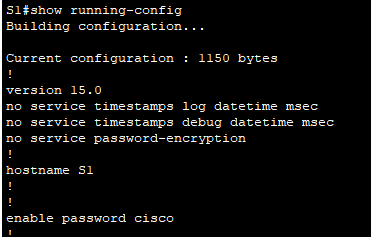
0x02 第二部分
第 2 部分:加密通訊
0x021 第二部分 步骤1
步驟 1:設定 IP 網域名稱並 產生安全金鑰。
使用 Telnet 通常是不安全的,因為資料是以純文字 傳輸。因此,若可以請使用 SSH。
是这样的,随便一个网络抓包工具,能看到你输入的全部明文。
可选:查看交换机是否支持密码加密功能
S1# show version

在enable模式下执行(#模式)
S1#show version
Cisco IOS Software, C2960 Software (C2960-LANBASEK9-M), Version 15.0(2)SE4, RELEASE SOFTWARE (fc1)如果包含K9则支持:
C2960-LANBASEK9-M
             K9 -> 支持
支持
0x021a 步骤a
a. 將網域名稱設定為 netacad.pka.
进入config模式(全局配置模式)
S1#config
S1(config)#ip domain-name netacad.pka
0x021b 步骤b
b. 加密資料需要安全金鑰。使用 1024 金鑰長度產生 RSA 金鑰。
- 输入
crypto key generate rsa - 输入
1024
S1(config)# crypto key generate rsa
How many bits in the modulus [512]: 1024
输出:
S1(config)#crypto key generate rsa
The name for the keys will be: S1.netacad.pka
Choose the size of the key modulus in the range of 360 to 2048 for your
  General Purpose Keys. Choosing a key modulus greater than 512 may take
  a few minutes.
How many bits in the modulus [512]: 1024
% Generating 1024 bit RSA keys, keys will be non-exportable...[OK]
0x022 第二部分 步骤2
步驟 2:建立 SSH 使用者,並 重新設定 VTY 線路僅供 SSH 存取。
0x022a 第二部分 步骤2.a
a. 建立使用者 administrator 及加密 密碼 cisco。
S1(config)#username administrator secret cisco0x022b 第二部分 步骤2.b
b.設定 VTY line以檢查登入 憑證的本機使用者資料庫,並僅允許 SSH 進行遠端存取。移除現有的 vty line 密碼。
line vty 0 15进入VTY线路配置模式transport input ssh命令,仅允许使用 SSH 进行远程访问login local将 VTY 线路配置为检查本地用户名数据库查找登录凭证no password删除当前密码exit退出
S1(config)#line vty 0 15
S1(config-line)#transport input ssh
S1(config-line)#login local
S1(config-line)#no password
S1(config-line)#exit
0x023 第二部分 步骤3
步驟 3:驗證 SSH 實作
0x023a 第二部分 步骤3.a
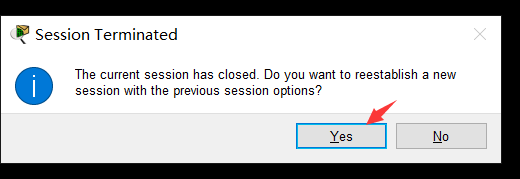
a. 離開 Telnet 工作階段,並嘗試使用 Telnet 重新登入。 嘗試應該會失敗。
- 一直输入
exit,退出当前连接 - 提示是否需要重连,点击
YES,但是会出现重连失败,不断弹窗。 - 修改正确,无法使用Telnet登录交换机
0x023b 第二部分 步骤3.b
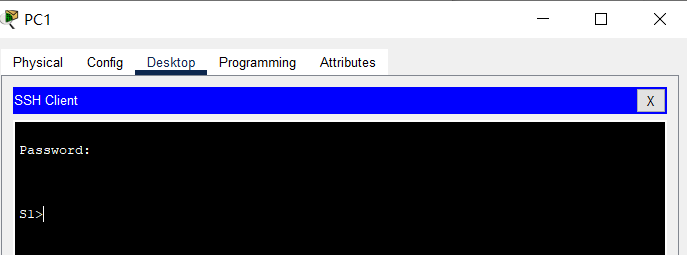
b. 嘗試使用 SSH 登入。輸入 ssh 並按 Enter ,不帶任何參數以顯示命令使用說明。提示: -l選項是 字母 “L”,而不是數字 1。
- 切换为SSH登录模式
- 输入IP:10.10.10.2
- 用户名:administrator
- 连接
- 输入密码:cisco
- 进入交换机
用户名 密码 如下:
administrator
cisco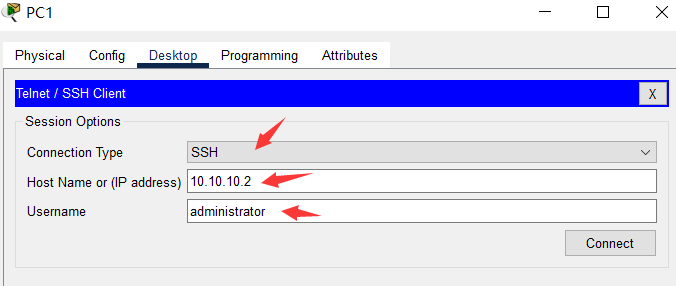
0x023b 第二种演示,题目直接要求方法
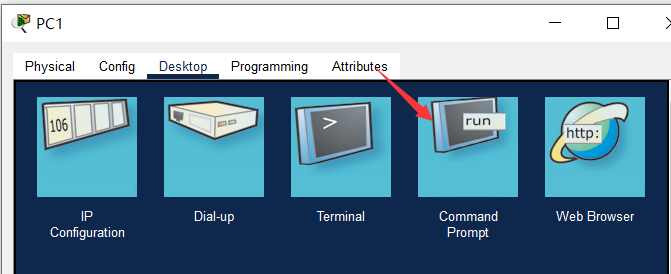
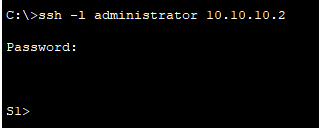
他这里要求的方法大概是用电脑的cmd的ssh命令来进行连接。
这里用第二个方法演示
- 打开CMD
输入:
ssh -l administrator 10.10.10.2- 输入密码即可
0x023c 第二部分 步骤3.c
c. 成功登錄後,進入特權 EXEC 模式並儲存 設定。如果你無法成功存取 S1,請關開 電源,然後在第 1 部分重新開始。
- 输入
enable进入使能模式 - 输入
copy running-config startup-config回车
S1>enable
Password:
S1#copy running-config startup-config
Destination filename [startup-config]? [回车]
Building configuration...
[OK]
S1#
纯命令独享版:
这个版本忽略了一堆介绍和详细信息,只有命令
Password: cisco
S1>enable
Password: cisco
S1#copy running-config startup-config
Destination filename [startup-config]? [回车]
S1#config
S1(config)#service password-encryption
S1(config)#ip domain-name netacad.pka
S1(config)#crypto key generate rsa
How many bits in the modulus [512]: 1024 【输入1024】
S1(config)#username administrator secret cisco
S1(config)#line vty 0 15
S1(config-line)#transport input ssh
S1(config-line)#login local
S1(config-line)#no password
【应该已经会被判为100分了】
S1(config-line)#exit
S1(config)#exit
S1#copy running-config startup-config
Destination filename [startup-config]?
[OK]
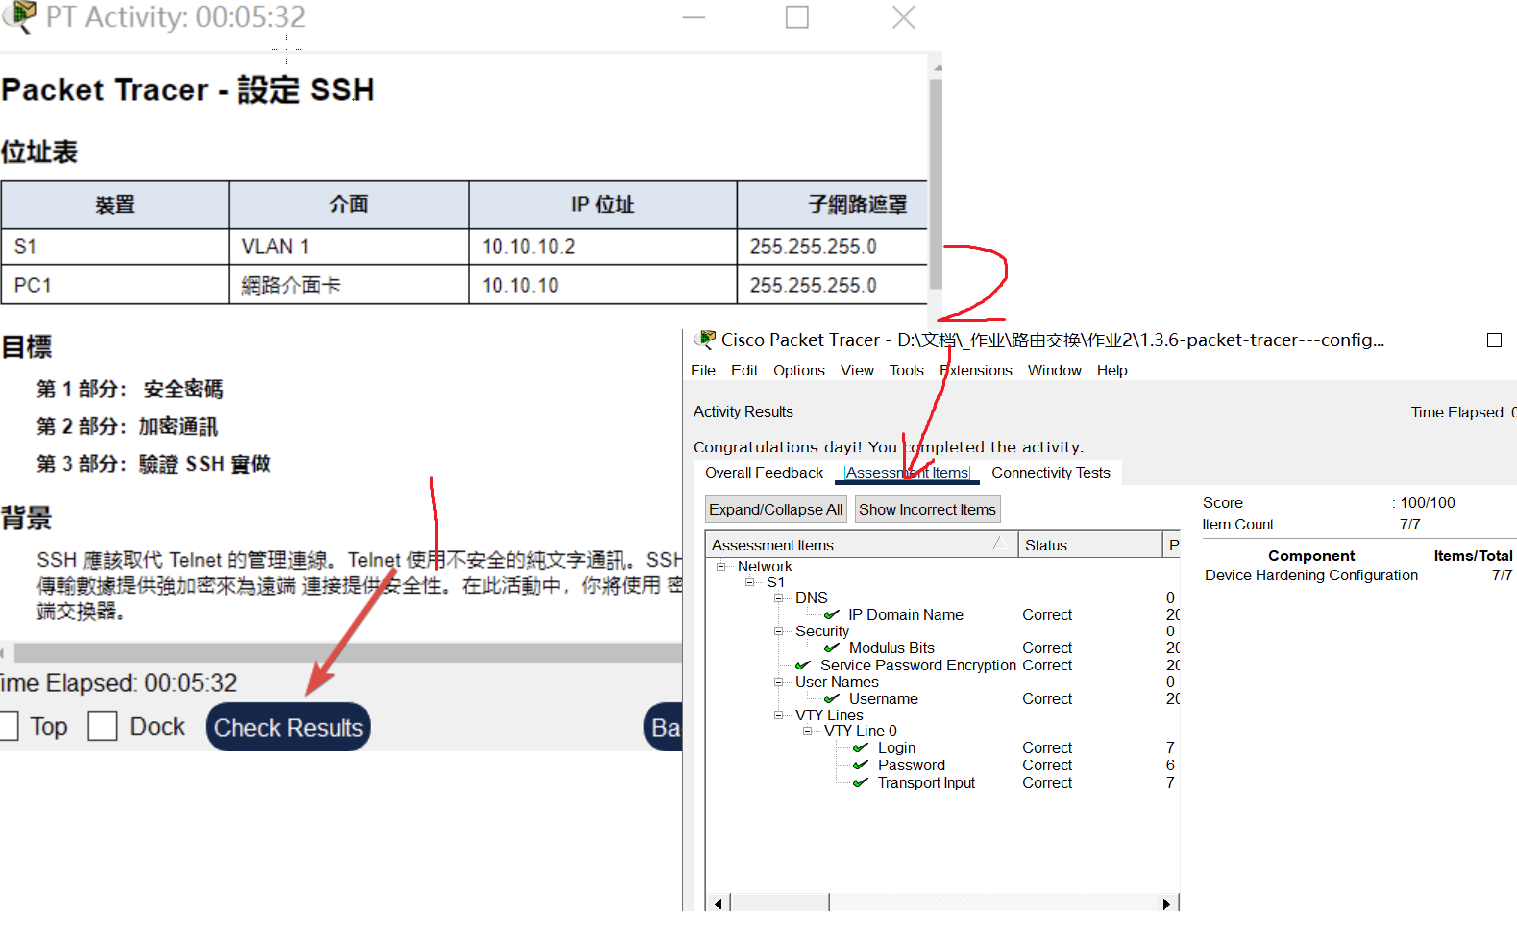
这个速通可以2分40秒得到100分,但是不建议这么做,还是多仔细做做比较好。

结果
点这里就可以

配好的文件下载:https://p.dabbit.net/blog/pic_bed/2023/03/435d2c383dfb4746_202303102143515.pka